Due to the current situation Worldwide, with the COVID-19, the need has been observed to document best practices to guarantee that, if both printer and printheads are stopped for an indeterminate period, this is done in the most optimal way possible.
Procedure for turning the printer OFF
1. Switch off the printer from the Front Panel (do not switch off the printer from the mains switch or the circuit breakers).
2. Turn off the wall circuit breaker.
3. Open the printhead access door in the side of the printer.

4. Lift the carriage cover.
5. For each PH, open the latch.
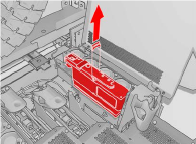
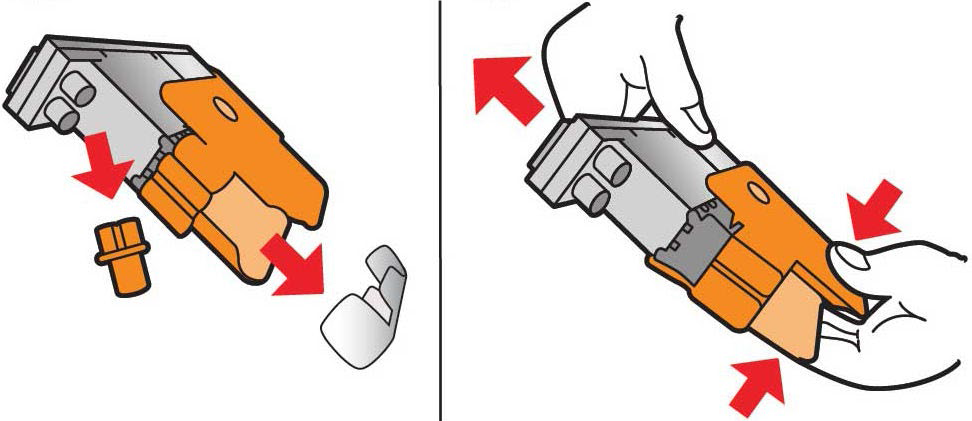
6. Lift the handle provided with the printhead, and pull the handle gently upwards to disconnect the printhead from the carriage, as shown in the following illustration:
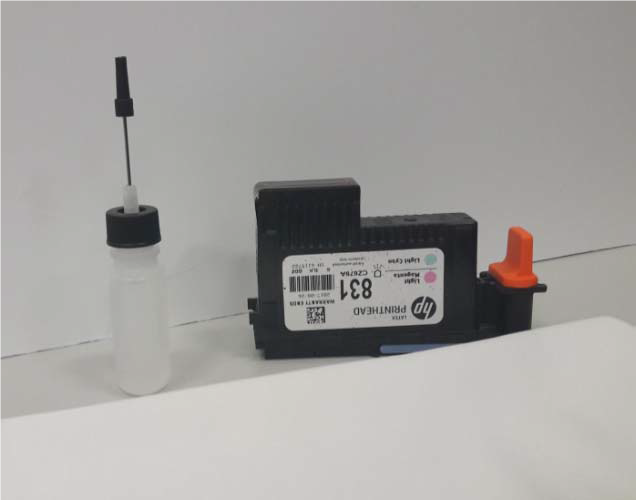
7. Carefully remove the printheads from the carriage and protect them using the original orange sealing caps and rubber.
CAUTION: Ensure that each printhead uses its own orange sealing cap and not the cap for some other printhead.
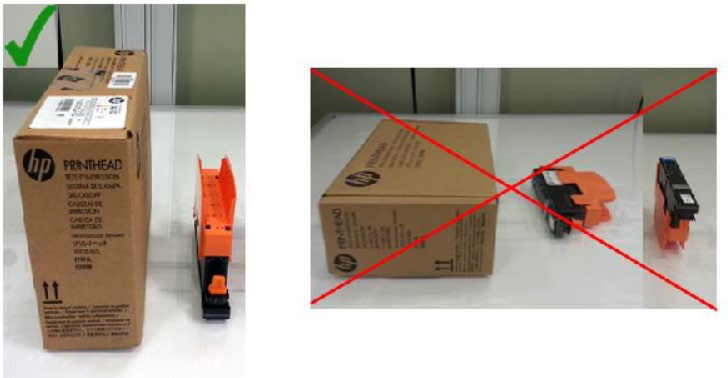
a. Store all printheads vertically, in an upright position, as shown in the following images, with the orange cap facing up:
8. Disconnect all ink cartridges.
9. Optimal conditions for the printer, ink cartridges, and printheads during shutdown is from 15°C to 30°C (59°F to 86°F) and 20% to 70% relative humidity.
a. If the printer is going to be exposed to temperatures below 5°C (41°F), a certified engineer is required to flush the ink lines from the printer.
NOTE: If the printer is going to be idle for more than 3 months, it is also recommended to flush the ink lines from the printer.
Procedure for turning the printer ON
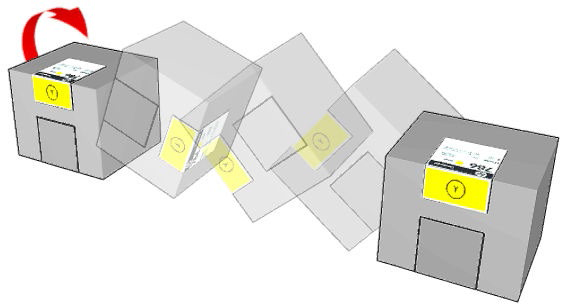
1. Place the cartridge on a flat surface and turn it (rotating it through 360 degrees), as indicated on the label, to ensure that the ink is well mixed before use:
2. Insert all ink cartridges back into the original ink channels.
3. Remove the Left side lateral panel and the Left side rear panel to access the intermediate tanks (6 on each side). A T30 tool is needed to remove the screws.
NOTE: each intermediate tank must be in the same position when reinserted, so ensure each one is correctly identified.
4. Perform the following steps for each intermediate tank:
IMPORTANT: In order to avoid mixing positions of intermediate tanks, so this procedure one intermediate tank each time.
a. Remove the intermediate tank and place it horizontally on a flat surface.
b. Turn/rotate the intermediate tank four times to mix the ink inside (rotate through 360 degrees, as done with the ink cartridges in step #2).
c. Reinstall the intermediate tank after the process is complete.
d. Repeat steps a, b and c for each intermediate tank.
e. Place the covers back in position with the screws.
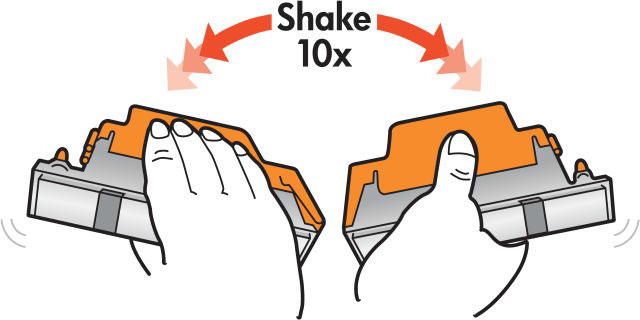
5. Shake all printheads 10 times according to the following image:
6. Insert all printheads.
7. Turn ON the wall circuit breaker, the printer, and the IPS PC, in this order.
8. It is recommended to complete a Check & Clean and a Hard Clean for all colors.
9. Print a “Verify Printhead Status” plot to check the nozzle conditions.
10. Complete a printhead alignment calibration.
11. The printer should now be ready to start production.