You may want to add a new substrate preset for various reasons:
● To assign a name of your own choice to the preset.
● To adjust the preset to the precise characteristics of your substrate.
● To adjust the preset to your intended use of the substrate, which may range from highest-quality printing to fast production output.
To clone a substrate preset, follow these steps:
1. HP strongly recommends loading the substrate for which the preset is intended into the printer before proceeding with this process.
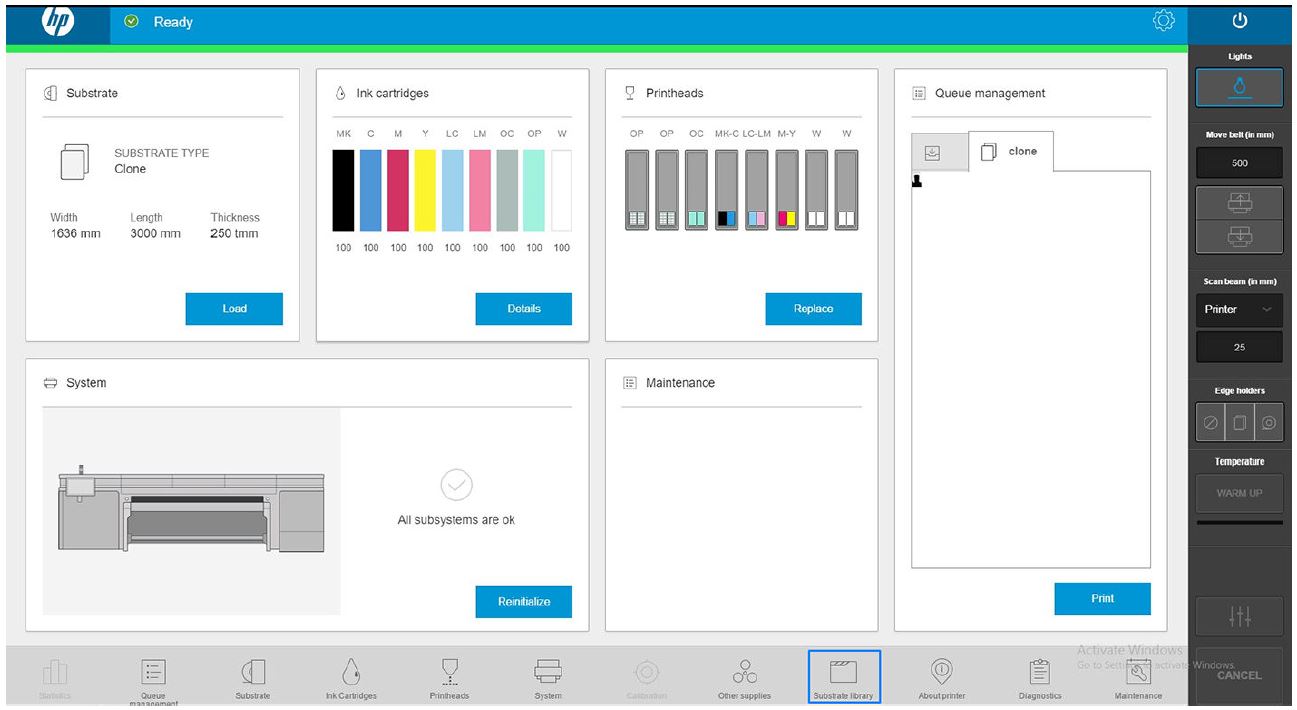
2. Go to the Internal Print Server and tap Substrate library, among the icons at the bottom of the screen.
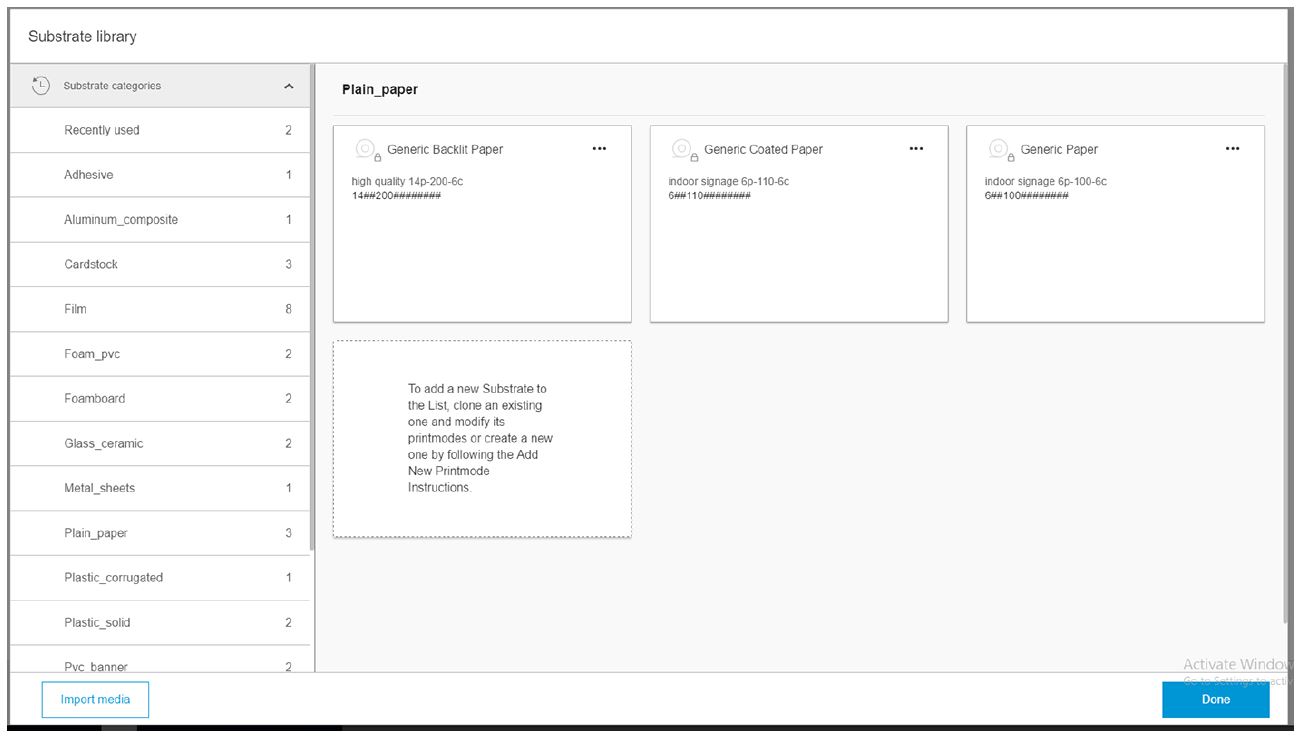
3. Select a preset from the Substrate Library.
4. Tap Duplicate to clone the preset, and enter a name for the new preset.
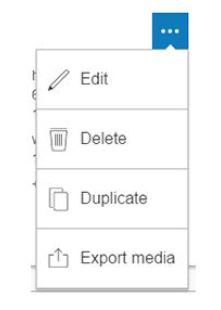
5. Tap Edit to modify the settings of the new preset.
6. Tap the icon pencil of the print mode that you want to modify; or tap Add new print mode. You can delete or change the name of any print mode; although you should keep at least one print mode.
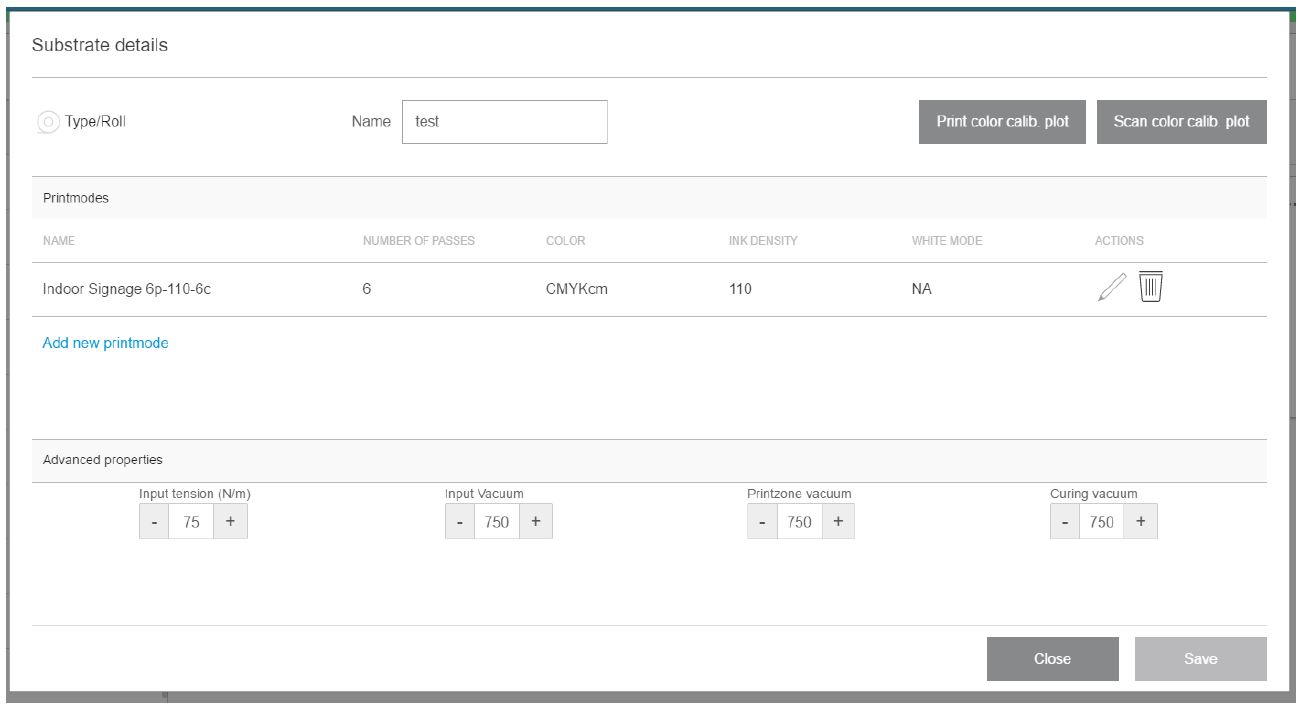
NOTE: You can define up to six print modes.
NOTE: The printing method and number of passes in an existing print mode cannot be changed. If you want to change either one of them, create a new print mode.
NOTE: You are not allowed to create two print modes with the same printing method, number of passes, and ink density.
7. You must now define your new print mode by editing its properties, and test it.
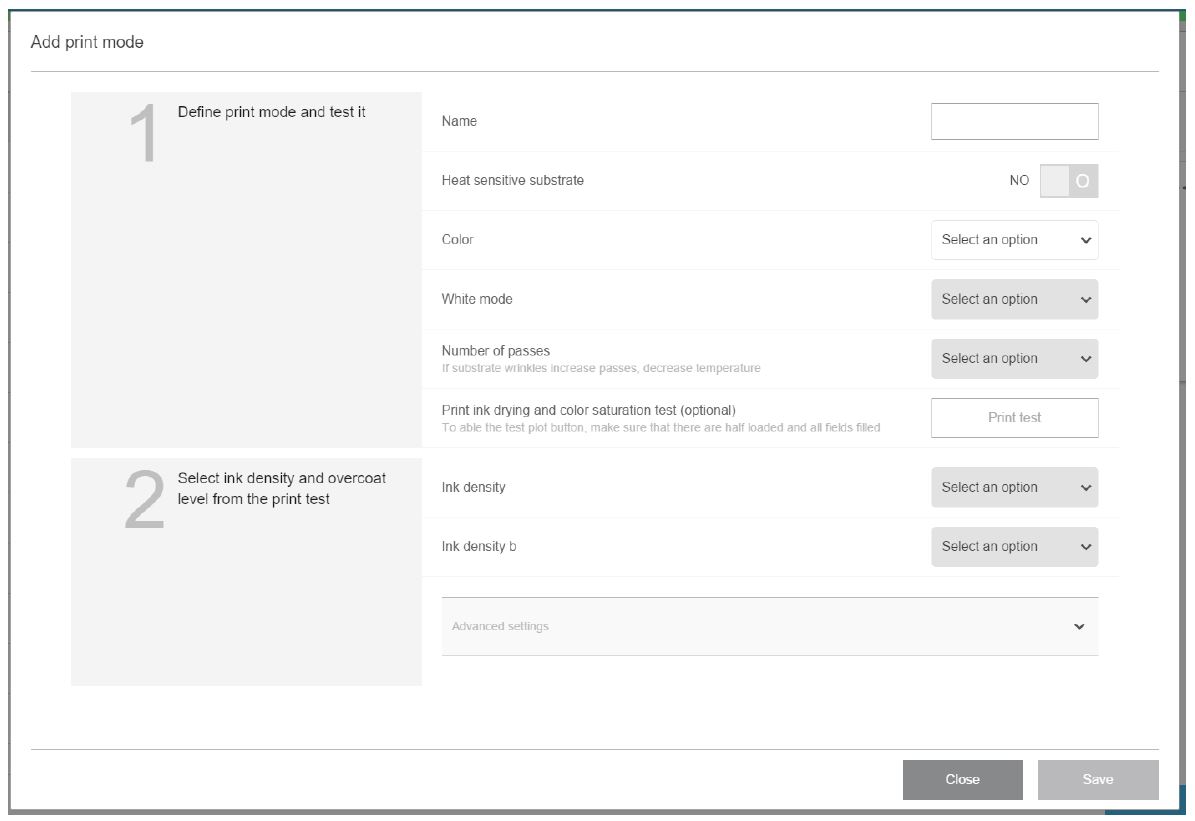
1. Define print mode and test it
● Print mode name: Choose a name to identify the newly created print mode.
● Heat sensitive substrate: Enable this option if the material suffers some deformation at high temperatures. Enabling this option will increase the number of passes and reduce throughput, so use it only when needed.
NOTE: If you have not already loaded the substrate, you can load it now.
● Color: Choose the color mode from those available.
– 4 colors (CMYK)
– 6 colors (CMYKcm)
– 6 colors (CMYKcm) + white
If you select the last of these options, you must select the amount of white ink to use, and how to position the white layer with respect to the colored layer:
– Underflood: The white layer is printed underneath the colored layer.
– Overflood: The white layer is printed on top of the colored layer.
– Spot: The white ink is printed at the same time and in the same way as the other inks.
NOTE: The complete set of these features will be available by the end of 2018.
● Number of passes: Choose the number of passes, which is inversely related to throughput. More passes mean lower printing speed but allow a higher ink density and/or higher curing capacity.
● Tap Print test to print the ink drying and color saturation test.
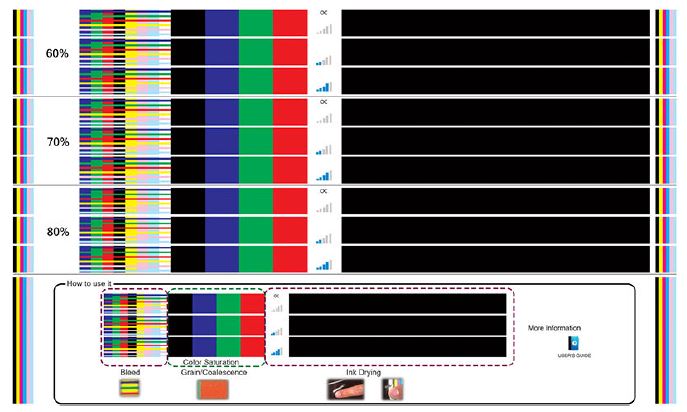
By printing this test you will be able to assess different color densities and different OC levels, leading to differences in color saturation, scratch resistance, durability, and ink drying capacity in the same plot.
Follow the instructions on the print to assess the results:
– Check the bleeding and coalescence to identify the correct ink density.
– For the chosen ink density, test the overcoat level by scratching the print with your fingernail.
Move on to part 2 and adjust the values according to your observations of the test print. ENWW
2. Select preferred OC level and ink density
● OC level: To enhance durability, including resistance to rubbing or scratching, different different levels of OC can be selected. A low OC level may be enough for prints that you intend to laminate; however, prints for long-lasting applications may require a higher OC level.
● Ink density: Ink density is related to color saturation. If you want more saturated colors, increase the ink density.
● Print mode name: When you have chosen the OC level and the ink density, choose a name to identify the newly created print mode.
IMPORTANT: To change the ink density and overcoat level values, you must print the test described above. Check it and choose the number in the pull-down color-saturation menu that matches your preferences in terms of curing and drying.
If you cannot get satisfactory results, try changing the temperature and reprint. You can also change the advanced settings.
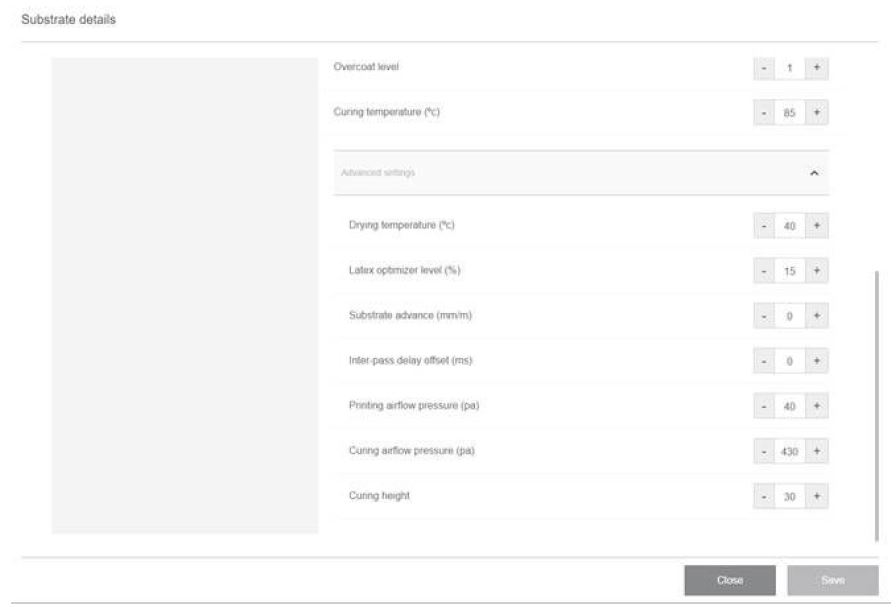
● Curing temperature: The curing temperature enables latex curing and film formation. You could increase the temperature if you see that the ink is not dry enough. Be aware that some substrates are heat-sensitive. An increase in temperature can cause substrate warping, deformation, or wrinkles.
● Advanced settings:
– Drying temperature (°C): Increase print-zone heat to dry faster. Be aware that some substrates are heat-sensitive. An increase in temperature can cause substrate warping, deformation, or wrinkles.
– Latex optimizer level: Increase optimizer level to reduce bleeding and coalescence, and increase the sharpness of the image.
– Substrate advance: Adjust the substrate advance if you see misalignment in this direction. This tends to improve grain, text quality, image sharpness in general, deformation, and wrinkles.
– Inter-pass delay offset : Add an interpass delay offset if the print is not sufficiently sufficiently dry or sufficiently sufficiently cured. It reduces the printing speed and throughput, for the same number of passes.
– Printing airflow airflow pressure: Increase drying pressure to dry a wider area. This improves drying performance.
– Curing airflow pressure: Increase curing pressure to cure a wider area. This improves curing performance.
– Curing height: Increasing curing height reduces curing performance but can help to avoid deformation of heat-sensitive substrates, as well as reducing printing defects caused by airblowing orifices of the impinging plate.
3. Perform color calibration and create an ICC profile
● Automatic color calibration: Color calibration is recommended to ensure color consistency. This process is automatic and takes around 15 minutes.
NOTE: This feature will be available by the end of 2018.
Apart from adding a new print mode, you can alternatively print the ink drying and color saturation test with the existing print modes, but for a new substrate. The workflow is similar to adding a new print mode.