
White ink data is defined in Adobe Illustrator and InDesign® as spot colors. This chapter will cover the steps used within Illustrator only, although similar steps are used in InDesign. For more information about using spot colors within InDesign, refer to the InDesign Help function.
Creating and using a spot color
To begin, ensure that the Swatches window is visible. If you do not see it, click on Window and choose Swatches. Create a new swatch using the New Swatch icon at the bottom.
Change the Swatch Name to “Spot1” (Onyx) or “White” (Caldera). Change the Color Type to Spot Color. These two steps are important for the RIP software to automatically be able to assign your spot color to the white ink channel.
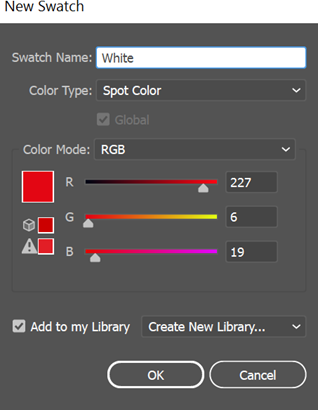
You can change the color that visually represents the white ink spot when viewing the file in the application. This is helpful to differentiate the white ink spot color from areas that are blank or have no color data. It is recommended to select a color that is not present in the original file.
Once you have created the spot color swatch, it is ready to be used in the design of your file. The swatch is found in the Swatches window. It has a small dot in the lower right corner of the swatch to indicate that is a spot color.
You can control the density of white ink using the slider or numerical control in the Color window. Note that using the Transparency control will also affect the density of the spot color and has a cumulative effect (70% density with 50% transparency results in an overall density of 3).
Overprint attribute
Normally, when you create and print overlapping elements, the top element knocks out the area of the element underneath. This is the default mode for Illustrator. In the example below, a box was created using the spot color swatch (white ink) and yellow text was placed on top. The yellow text knocks out the spot swatch data below. The two colors do not mix. If this was printed on black media, the yellow text would have no white ink underneath it and this would make it difficult to see the yellow.
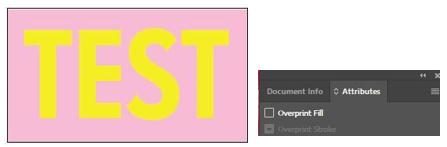
Overprinting prevents knockout and allows elements to print over or under other elements. This is important when using white ink as a spot color. You will need to enable the overprint attribute when the artwork needs to be printed over top of or under the white ink. This option is found in the Window menu under Attributes. When you select your shape, the options for Fill and Stroke will be available based on the object’s characteristics.
If the example below was printed on black media, the yellow text would print on top of a uniform box of white ink.

Layer ordering
When printing using a spot color swatch, the order of the design elements, or Layers, is important. Generally, you want to place all of the elements that contain the spot color swatch (white ink) in the top layer and color elements and images in the layer below. Also, if the top (white ink) layer contains both knockout elements and Overprint elements, place the elements with the Overprint attributes at the bottom of the top layer.

NOTE: The order of the layers does not affect the order of how the printer lays down the ink (white ink under color or color under white ink). This is controlled in the RIP.
Create a choke
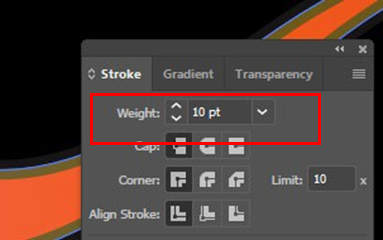
Sometimes, white ink can show misalignment, and white ink will go out of the image area. In order to avoid this, the file can be choked in Adobe Illustrator.
Select in the white channel the area to shrink. Go to Windows > Stroke. Apply the Stroke desired to the white layer.
By increasing it, the white layer goes inside of the colored layer.
Saving the file
It is recommended to save your file in Adobe Acrobat (PDF) format. While it is possible to save Illustrator files with white ink data outside of the file area as a Postscript (PS) or Encapsulated Postscript (EPS) file, it is important to remember that of the three file types, only PDF files support transparency. This is important if your file has white ink data that crosses a transparency bounding box. When this happens, a PS or EPS file will flatten the transparency. As a result, the white ink data is lost. Do not use any of PDF/x standards, as most of these standards will flatten your transparent regions.
When printing with white ink, composite PDF files only work when the spot color swatch in the file has a single density. If the spot color swatch has more than one density or uses a gradient, the file must be saved as a Separation File.
Creating a separation file
Creating a separation file involves using Illustrator’s printing function. “Printing” a separation file takes the color data and creates multiple pages (also referred to as plates): one for each color channel. A standard CMYK file will contain four pages. Files containing a spot color will have a fifth page.
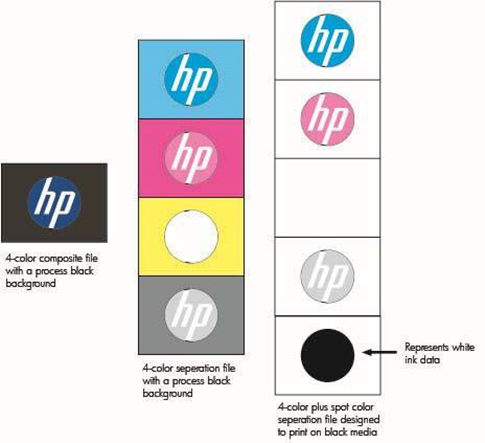
Unlike the representation above, when viewing a separation PDF file, the pages will be in black and white.
Each page will reflect where that particular channel contains data (some percentage of black) and where it does not (white).
To save your file as a separation file, select File and then Print. In the print dialog window, change the Printer to Adobe PDF.
You will likely see that the image preview is not sized correctly. The Adobe PDF printer uses standard page sizes, such as letter or “Defined by Printer.” To adjust the image to your art board size, change Media Size to Custom.
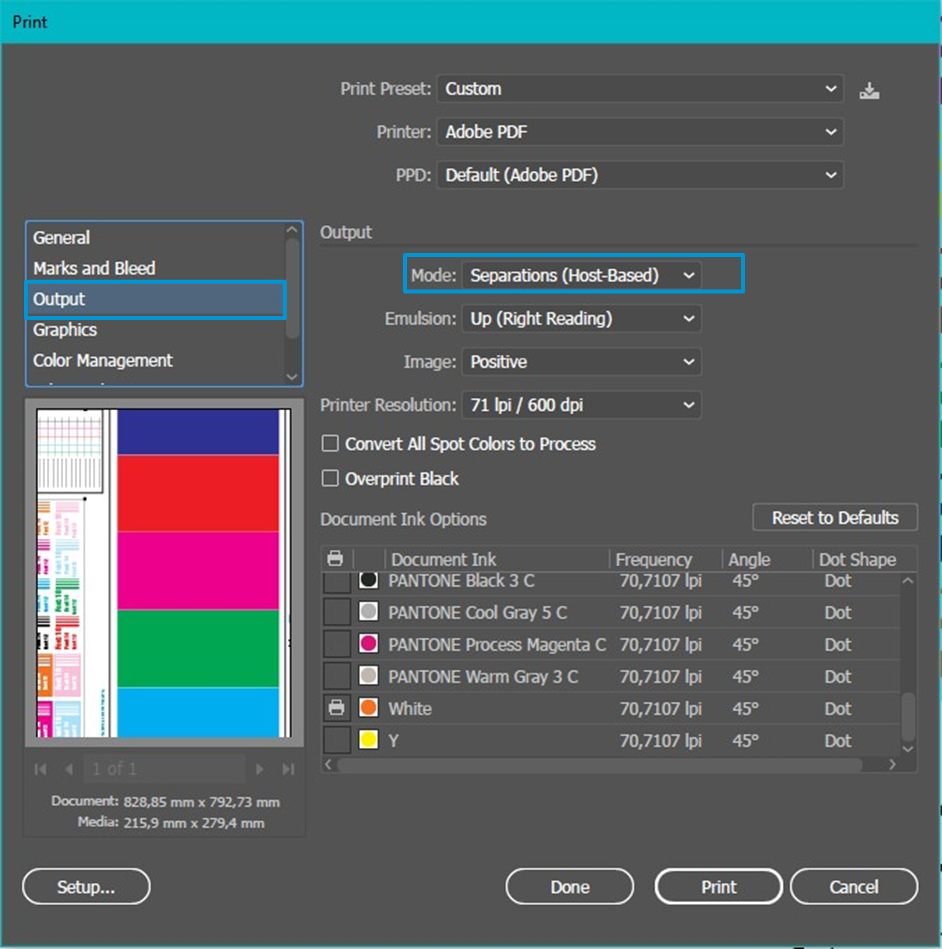
Click on Output, located to the upper left of the Print window.
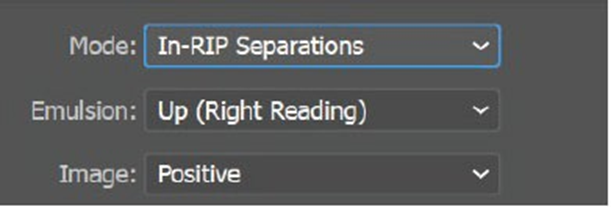
Click on the Mode drop-down menu and change from “Composite” to In-RIP Separations. This option indicates that this computer will create the separations. Once selected, the Document Ink Options change. You will see that the four process colors and the spot color are listed. Next to each of the separation colors are and icons. These icons designate spot colors and process colors.
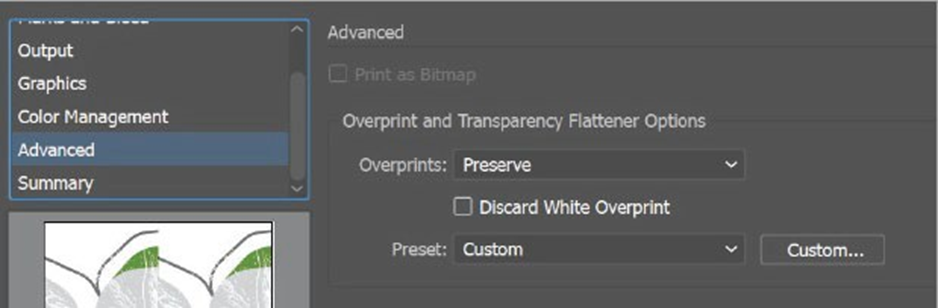
Make sure you preserve the overprint:
Select Print, and when prompted, enter a file name and location to save the file.
How to check if a white layer is created in Adobe Acrobat
In order to check if there is a white layer created in a pdf document, there is a simpler option than opening it in Adobe Illustrator.
In Adobe Acrobat, go to Print Production/Output preview. You will see, in the Separations preview, if a White layer has been created and if the naming is correct for your RIP.
Here you can access the full White Ink Workflow Guide for the HP Latex 700W, 800W, and R Series Printers.