
Depending on the file and how you set up your white ink data, there are specific methods to get your white ink data recognized by the Caldera RIP. There are tools within the software that can be used to apply white ink to an RGB or CMYK file. The RIP can also process files that have white ink data in the file itself. The first step, however, is to select the media profile.
Selecting the media profile
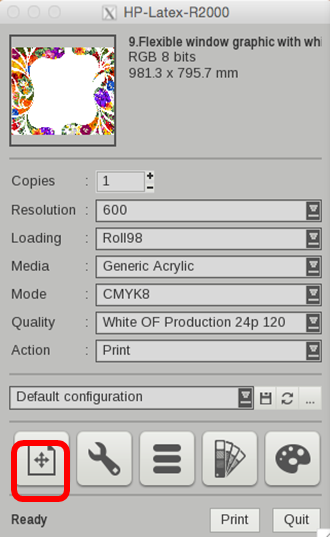
Open the Printer setup window by clicking on the HP Rx00 printer button. Select the down arrow to the right of the Media selection to display a list of available media profiles. Selecting the media profile determines both the order the printer lays down the white and color ink and controls the ink saturation depending on media type and viewing intent (e.g. backlit).
- White UF (Underflood) – Prints and cures the white ink followed by printing CMYK ink over the white.
- White OF (Overflood) – Prints and cures the CMYK ink followed by printing white ink on top.
- White SP – Uses the full width of all printheads to deliver CMYK and white ink at the same time. In this mode, white and color areas cannot overlap.
Press the Page Setup icon in the lower left corner for detailed white ink setup options.
Enable separation and method selection
Click on the tab labeled White in the Page Setup window. Click on the Enable Separation checkbox, and then select the Method for generating the white ink layer. The Method selection identifies what data will determine where white ink will be used.
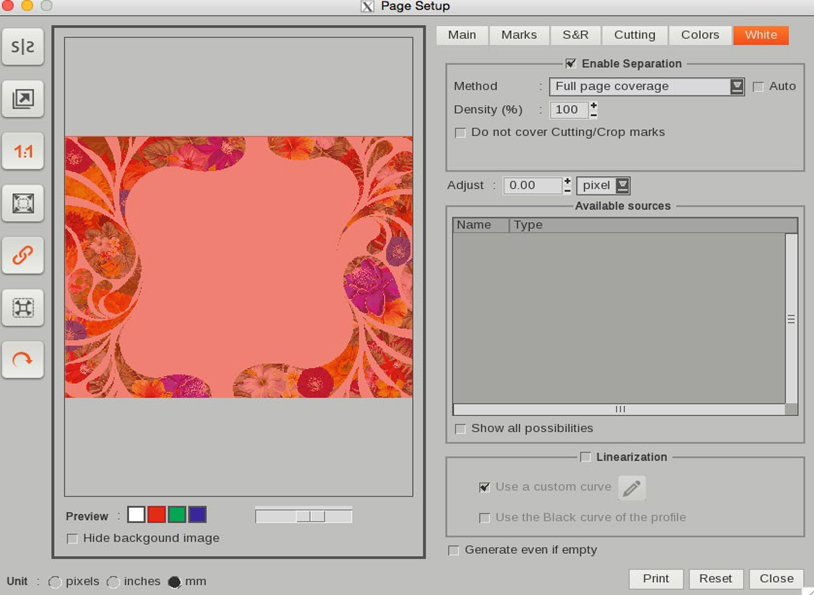
The choices are:
- Use a Spot Color – for files that have been created in Illustrator and contain a spot color identified as “White.” See section 3.1 for more details.
- Use an Extra-Channel – for files that have been created in Photoshop and contain a spot channel identified as “White.” See section 2 for more details.
- Fill a contour – for files that have been created in Illustrator and contain a spot color stroke identified as “WhiteContour.” See the Caldera – User Guide for more details.
- Generate from CMYK data – selecting this provides three options:
- Generate where there is some ink - a white ink fill is added to areas where there is CMYK image data
- Generate where there is no ink - a white ink fill is added to areas where there is no CMYK image data.
- Use a transfer function – a more precise method, using a look up table to adjust white ink, by pixel, based on the density of CMYK ink
- Full page coverage – this option generates a white ink fill over the entire page.
The density of the white ink can be controlled by entering a value in the Density (%) box for all but the “Use a Spot Color” and “Use an Extra-Channel” options, as these are controlled within the design application. You can also choke and spread the white ink by changing the Adjust value.
White ink preview
A preview of the page is displayed at the left. Normally it displays the CMYK data and white data. However, to more clearly see the white ink only, click on Hide background image checkbox in the lower left of the preview area.

Once you are satisfied that the white ink has been set correctly, submit your job to print.
Here you can access the full White Ink Workflow Guide for the HP Latex 700W, 800W, and R Series Printers.