
Depending on the file and how you set up your white ink data, there are specific methods to get your white ink data recognized by the Onyx RIP software.
Selecting the media profile
With a file open in Job Editor, from the Printer & Media tab, select a Media Configuration for the type of job you intend to print and the appropriate white print mode for the application wanted.
If you did not create the file and the spot color is named something other than “Spot1,” it is possible to assign that spot color name to the white ink channel in ONYX.
To do so, open your file with Job Editor and go to the Printer and Media tab. Click ICC profile set up.
Then go to Output and click Spot Channel Replacement.
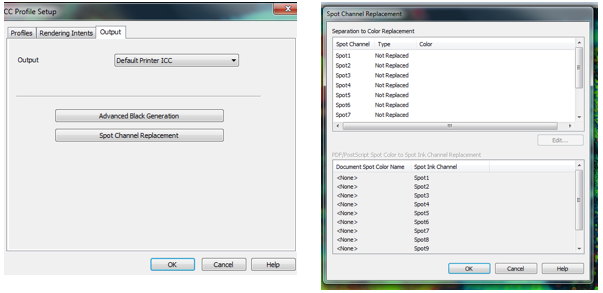
The Spot Channel Replacement option allows you to specify which spot color will be assigned to which spot ink channel. Either edit or create a QuickSet. Under the first window, click the Change Profiles button from the Color Management section. Click on the Output tab and select the Spot Channel Replacement button.
Then, under the first entry, double-click on and type in the spot color name. The name needs to match the spot color’s name exactly in order to map it to the Spot1 white ink channel. Once completed, click OK and then OK again to get out of the dialogues.
Enable separation and method selection
When opening a file with a white layer defined with the correct name, Onyx will recognize it automatically. It is visually displayed as a green layer wherever the white ink was defined by the design software.
If the file doesn’t have any white layer determined, it is possible to create one from Onyx.
To do so, open your job with Job Editor, go to Color Correction > Spot layer tool, and enable Spot layer generation.
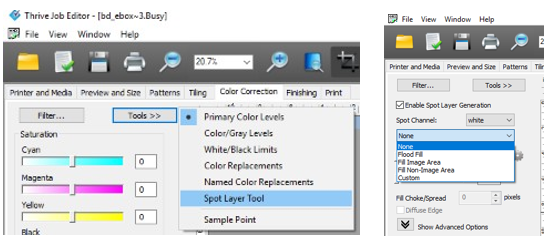
The Method selection identifies what data will determine where white ink will be used. The choices are:
- Flood Fill – this option generates a white ink fill over the entire page.
- Fill Image area – a white ink fill is added to areas where there is CMYK image data
- Fill Non-Image area – a white ink fill is added to areas where there is no CMYK image data
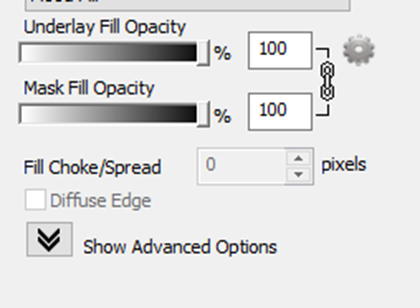
The density of the white ink can be controlled by entering a value in the Density (%) box. You can also choke and spread the white ink by changing the Fill Choke/Spread value.
Here you can access the full White Ink Workflow Guide for the HP Latex 700W, 800W, and R Series Printers.