To profile with white ink, a white ink layer needs to be applied by the RIP software while doing the process. Once we know where this option is, the profiling process is the same as for a white substrate.
Caldera
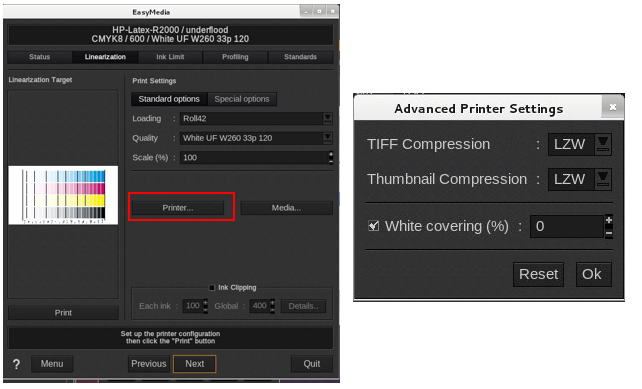
From the IPS, create your print mode with white ink (CMYKcmW). Synchronize Easy Media, and select the media preset desired.
For each chart, go to Printer, tick the White ink box and enter in the desired white ink %. Depending on the print mode you selected beforehand, it will either print overflood or underflood.
Then, follow the normal profiling steps.
NOTE: If next you need to profile without white, make sure that the white covering option is unticked. Remember, Caldera keeps what was done last.
ONYX
Go to Media Manager. select the print mode with white created before in the IPS. Follow the steps to profile.
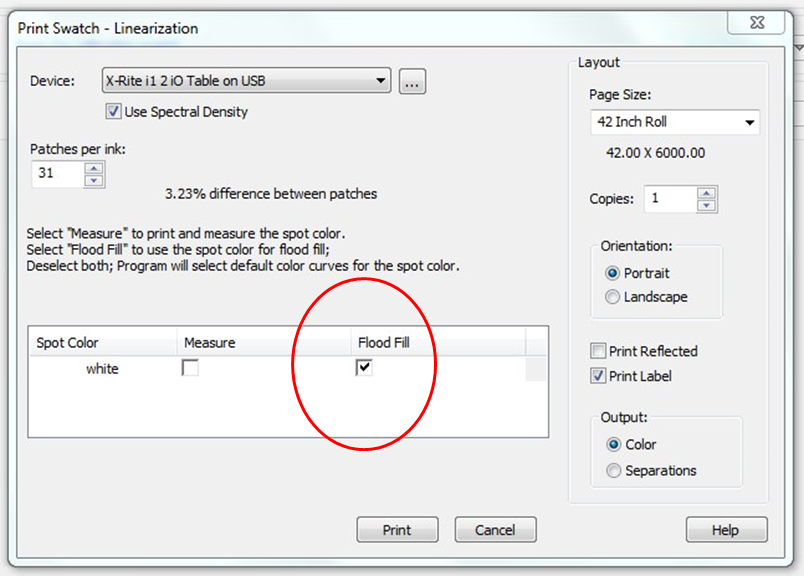
In the Print Swatch window, select your spot white and tick Flood Fill. This will create an underflood or overflood, depending of the print mode that was previously selected.
Print and follow the steps. Make sure the same flood type is selected for each step for the profiling process.
Profiling for Sandwich
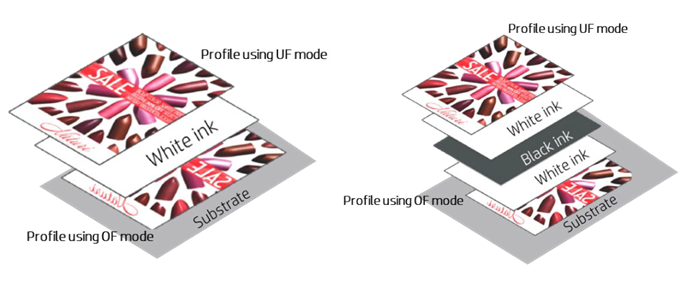
HP Profiles for sandwich print modes were created as follows:
- For the layer in contact with the substrate: The color charts were printed in OF and were protected for reading purposes
- The external layer was profiled printing the color charts in UF
Here you can access the full White Ink Workflow Guide for the HP Latex 700W, 800W, and R Series Printers.